
Nirvana has had another facelift! This time her old and leaky ports were removed and replaced with new "retrofit windows" from our sponsor, Cruising Concepts. Here's a how-to, but if you don't want to read all of this ... the pictures pretty much tell the story.
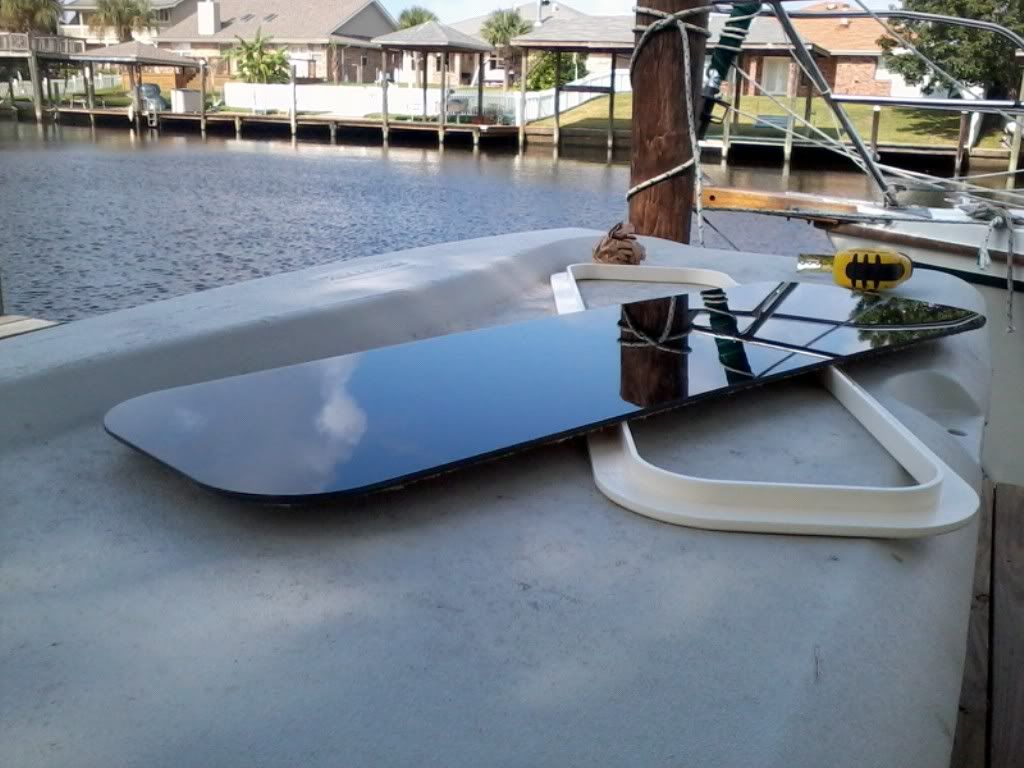
 The kit that we received from Cruising Concepts consisted of eight beveled Lexan ports, eight almond-colored interior trims, the screws (which we did not use) for the interior trims, and 3 tubes of Dow Corning 795 black silicone sealant.
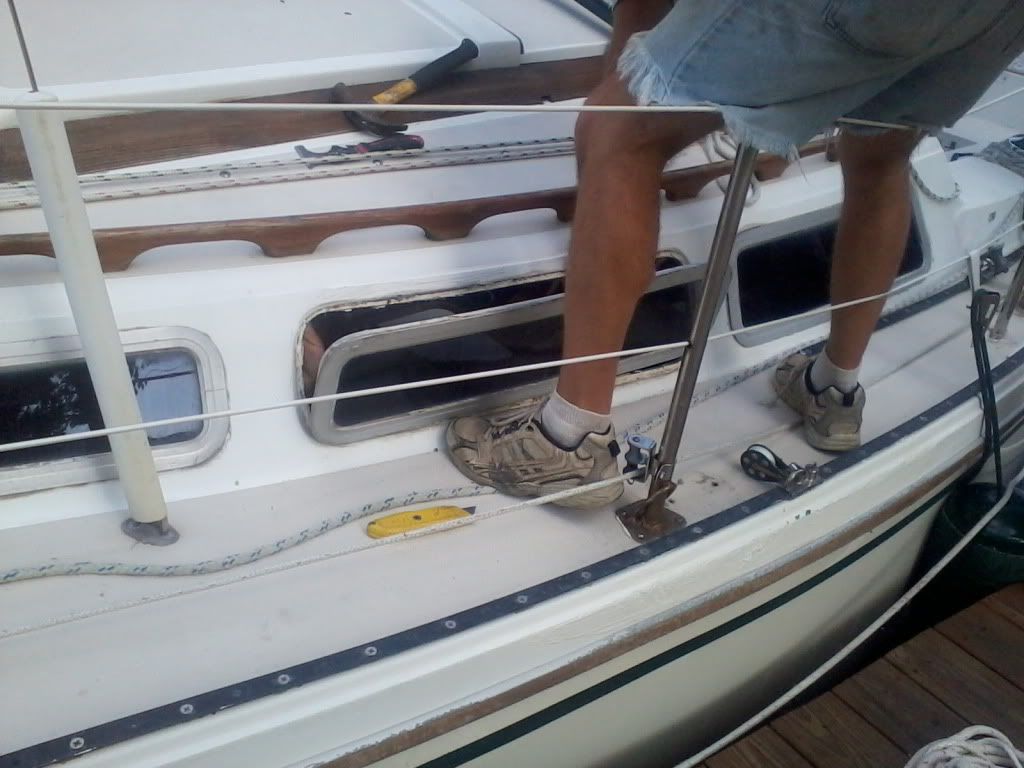
 With the help of a friend, Ken spent the first day removing the old ports, cleaning the "holes", and installing the new ports with the black silicone sealant that came with the retrofit kit. I was there to lend a hand when I could, but I mainly took pictures, handed the guys a tool every now and then, and cleaned up behind them to make myself feel useful.
The old ports came out easily with a crowbar and a hammer, and we hope to sell them soon ... any buyers?
The "holes" were then scraped free of debris and cleaned with acetone.

Then, the new port was positioned and marked with a pencil. The space between the "hole" and the pencil mark was filled in with a layer of the black silicone sealant, then another bead of the sealant was run in the middle of the black layer.
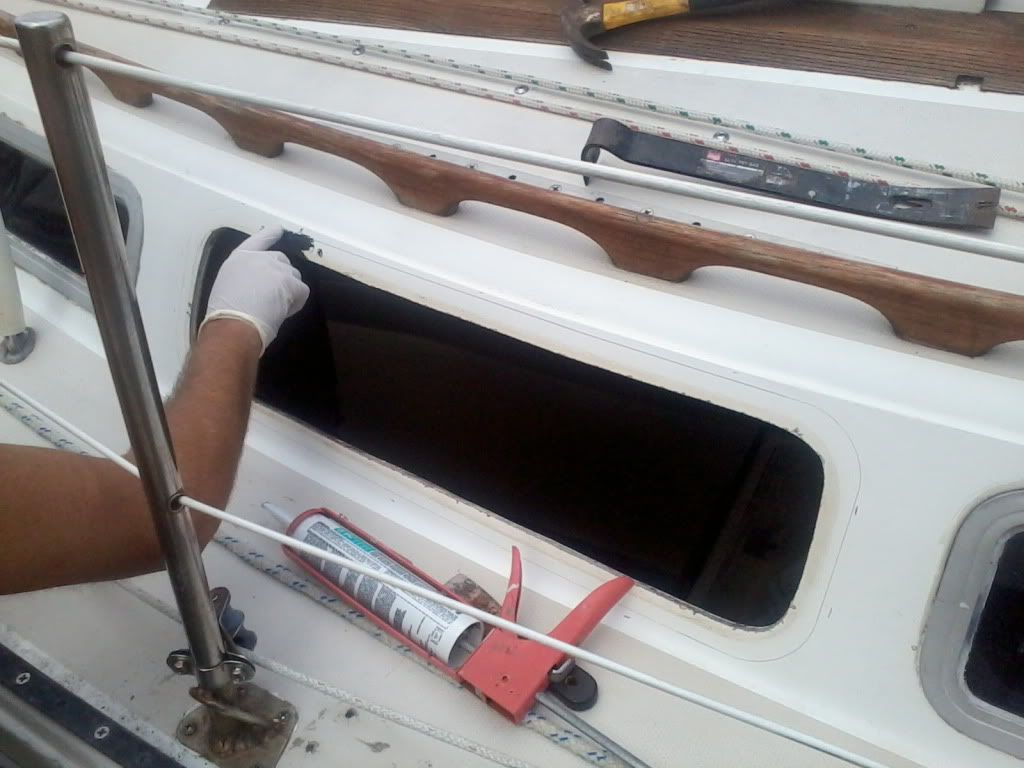
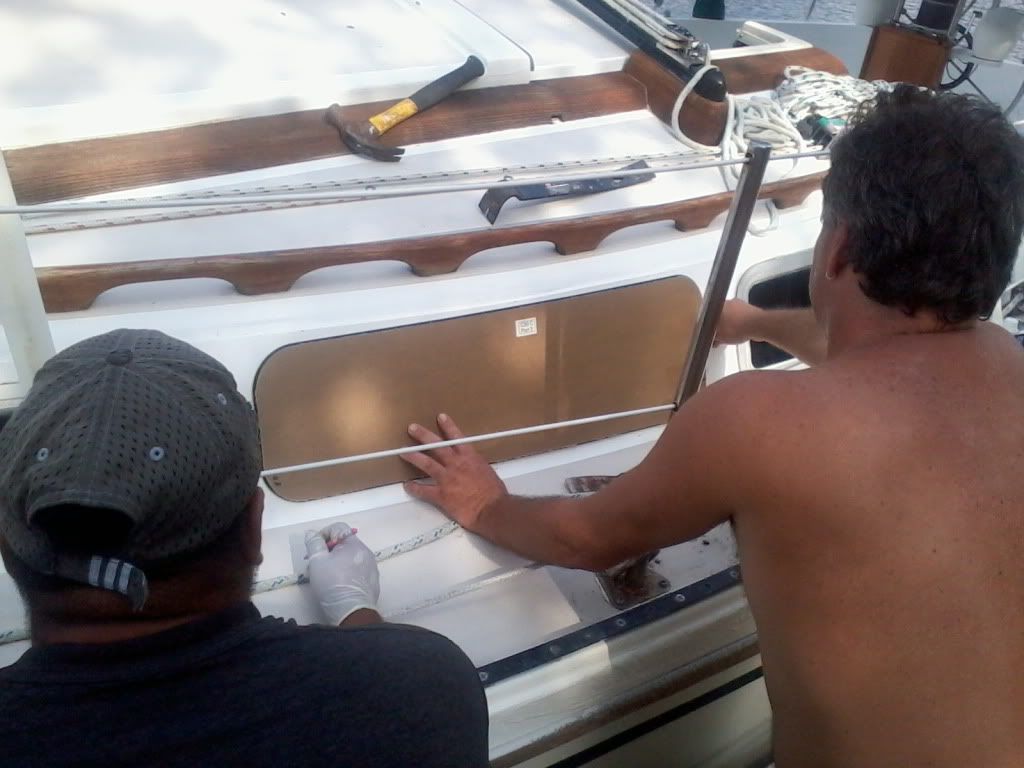
The port was then carefully positioned and pressed onto the sealant. At this time, Ken taped the corners of the ports to keep them from popping up. Some of the corners needed even more than tape, so Ken wedged a piece of wood between the port and the lifeline to keep pressure on the port overnight.


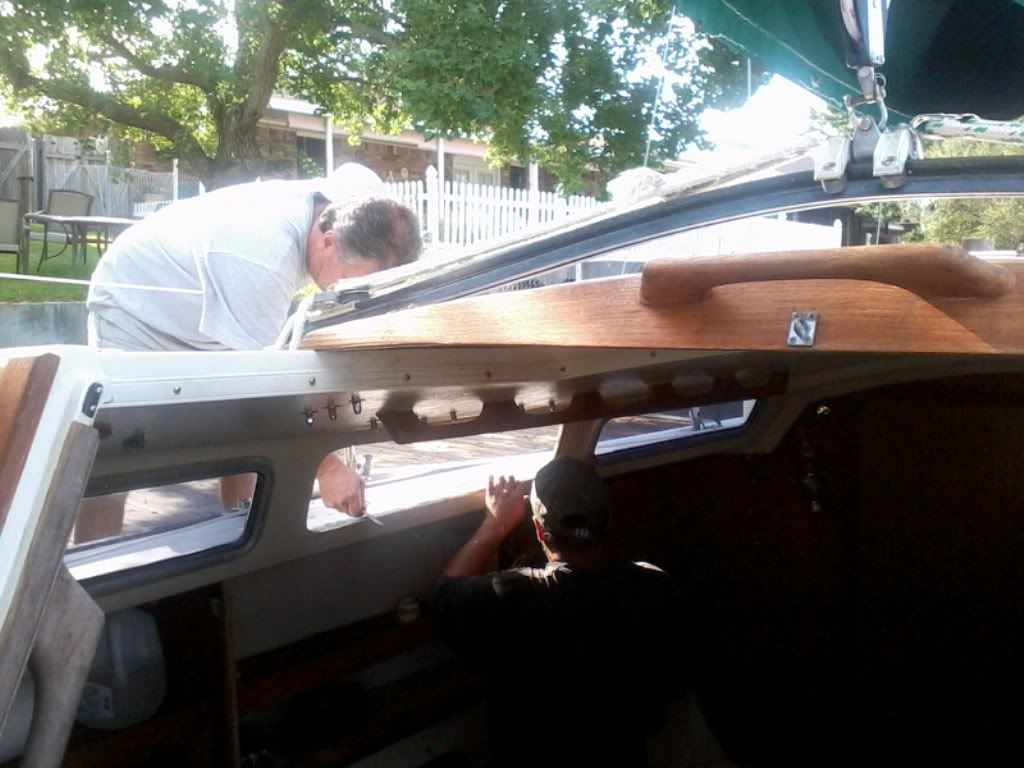
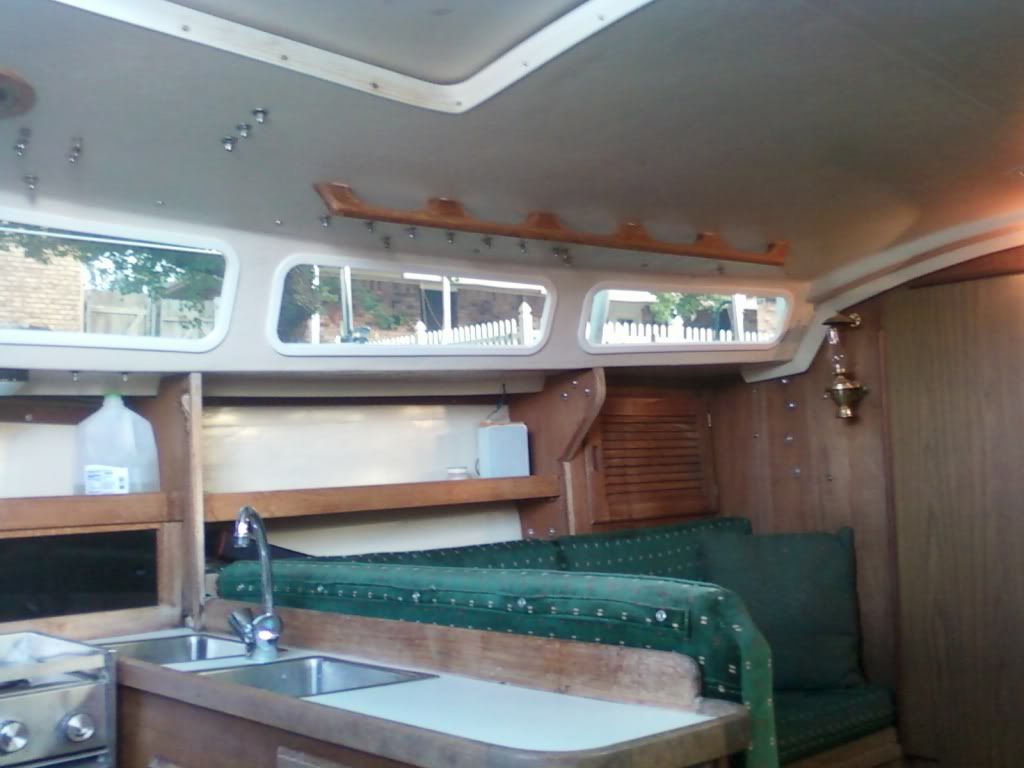
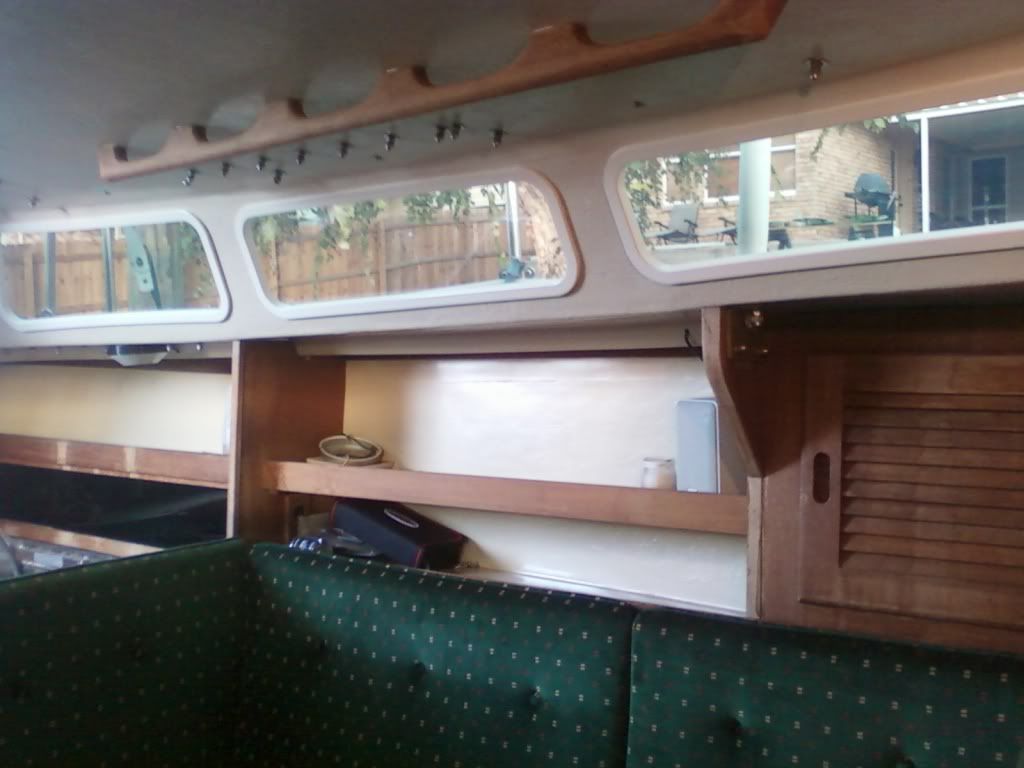
The interior of our sailboat already looks fresher and more open without those ugly aluminum frames! Ken and Rolando repeated this another three times on portside, then it was time to turn Nirvana around to access the starboard side. Since our new ports needed time to "set", we didn't want any vibration and didn't want to start the engine. So, we turned Nirvana around without the use of the engine ... just our dock lines. After the same process was complete on the starboard side, Ken and Rolando called it a day. Wouldn't you know that as the last port was being installed it began to rain. Where did that come from?! It wasn't supposed to rain! Luckily it didn't last very long and I immediately dabbed the edge of the ports with a towel and dried the deck. No harm seemed to be done, but it did put a "damper" to the end of our day. We really didn't want to think of having to do everything all over again! Luckily, we had great weather for the remainder of our project.


On the second day Ken noticed that a couple of the corners of the new ports were not completely stuck to the boat. So, he added a little more sealant to those areas and wedged a piece of wood between the lifelines and the port, as he had previously done to some of the corners that were stuck to the boat. On the rest of the ports on the starboard side, Ken used a razor blade to cut away the excess sealant that was now dry. He then ran a bead of the black sealant around the edge of the port. Since we had other work to do that day, we stopped at this point. This process took about an hour.
The third day started with cleaning around the ports on the starboard side. We were a little concerned about how easy (or difficult) it would be to clean the black smudges that remained from the sealant. At first we tried rubbing alcohol, then we tried acetone. The acetone removed the dark black smudges away pretty easily, but a gray stain remained behind. So, we cleaned around the ports with the acetone, then used 180 grit sandpaper to lightly sand away the gray stain. This worked really well, with very little pressure.
Now it was time to turn the boat around again without turning on the engine. Ken needed to repeat the same process on the starboard side, cutting away the excess sealant and running a bead of the black sealant around the edge of the ports. After he ran the bead of black sealant, Ken then installed the interior trims to portside, which was already dry from the previous day. The interior trim came with screws, but we really didn't want to use the screws if we didn't have to. The trim looked so sleek and nice, we didn't want to see screws! So, we bought some almond-colored adhesive sealant to install the interior trim. So far, this seems to work and we're really glad we didn't use the screws. After a couple of hours we were done for the day so the black sealant could dry around the starboard ports.
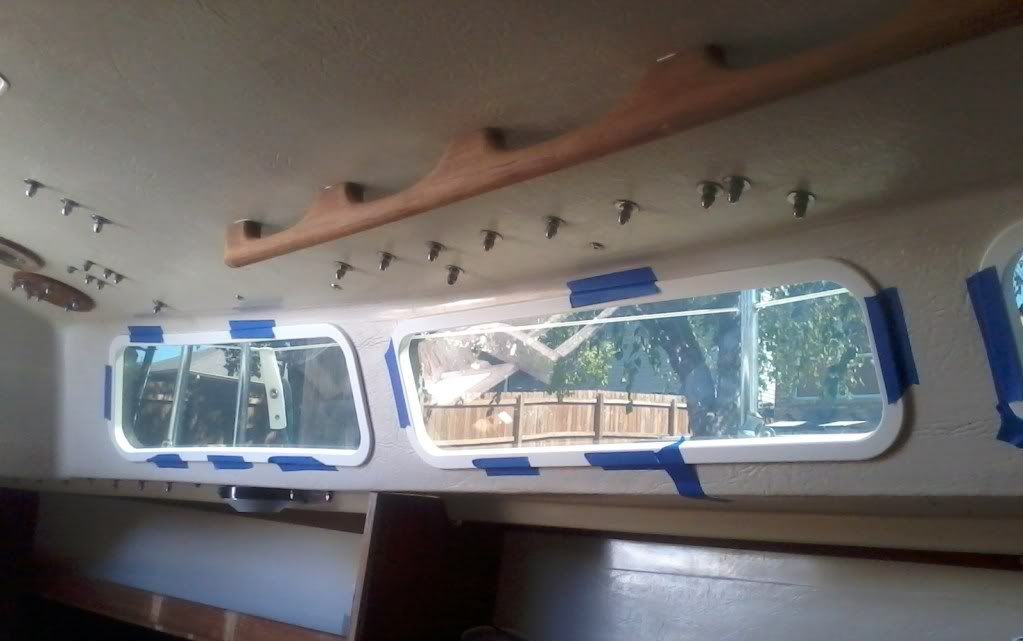
Interior trim applied then taped till dry
On the fourth day we cleaned the starboard ports with the acetone, then lightly sanded away the black smudges. Ken then added the interior trims to the starboard side, and we were now finally ready to remove the brown paper from the exterior of the ports and see the results of our work! The whole project took a full day with two men (and my help), and about another five hours off and on with mainly just Ken.
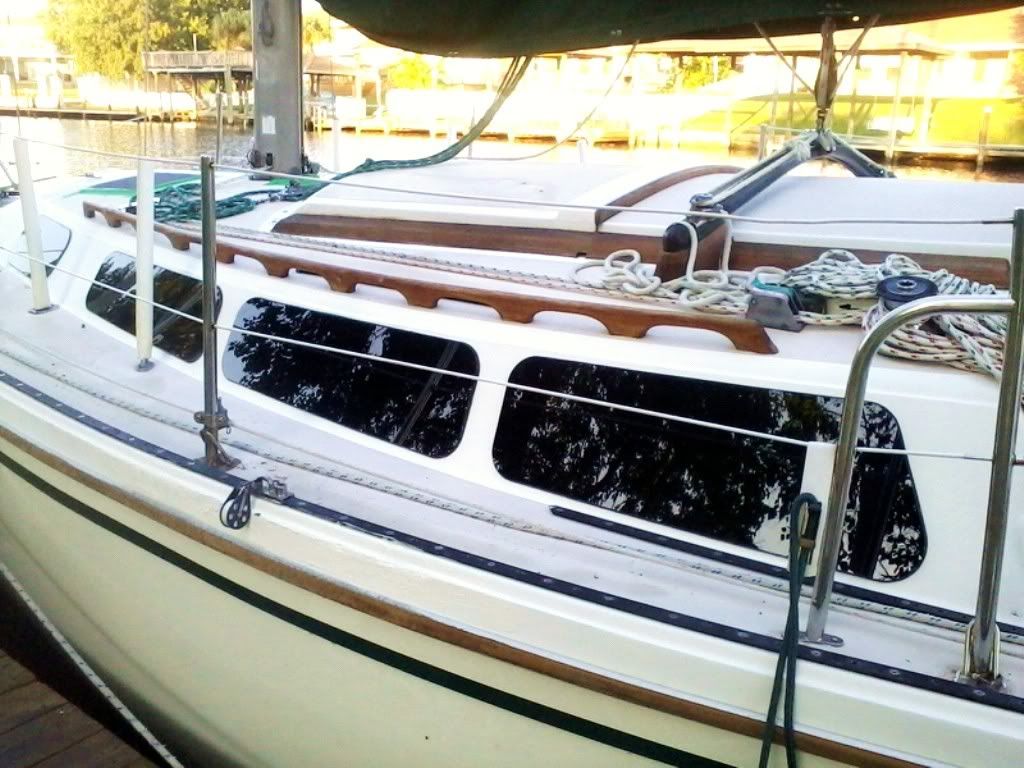
Ain't she sweet?!
I must admit that Ken was really concerned when we first received the ports, because he feared that the ports wouldn't fully adhere to the boat and that they would leak. He was also concerned that the Lexan ports would look like cheap plastic just stuck on our boat. However, I am pleased to say that we are both really happy with the results and would definitely recommend these ports. The Lexan ports are thick and beveled, and they look great on Nirvana! They only concern we still have is that Lexan scratches so easily. We've already broken in the ports with our first scratch, and this boat will be used a lot so ... we shall see.
The ports seem to have adhered really well (with the help of some added pressure) and we don't think that we'll have any leaks. Ken looked up information about the black sealant that came with the kit, and it is used to adhere windows to skyscrapers. This bit of info made us feel better. If this stuff can be trusted to hold up a window on a skyscraper than it oughtta be able to hold our little ports. Time (and rain) will tell!
Here are a few "before and after" shots, which really show the improvement the new ports make. Nirvana can't wait to get out on the water with her new, younger look!


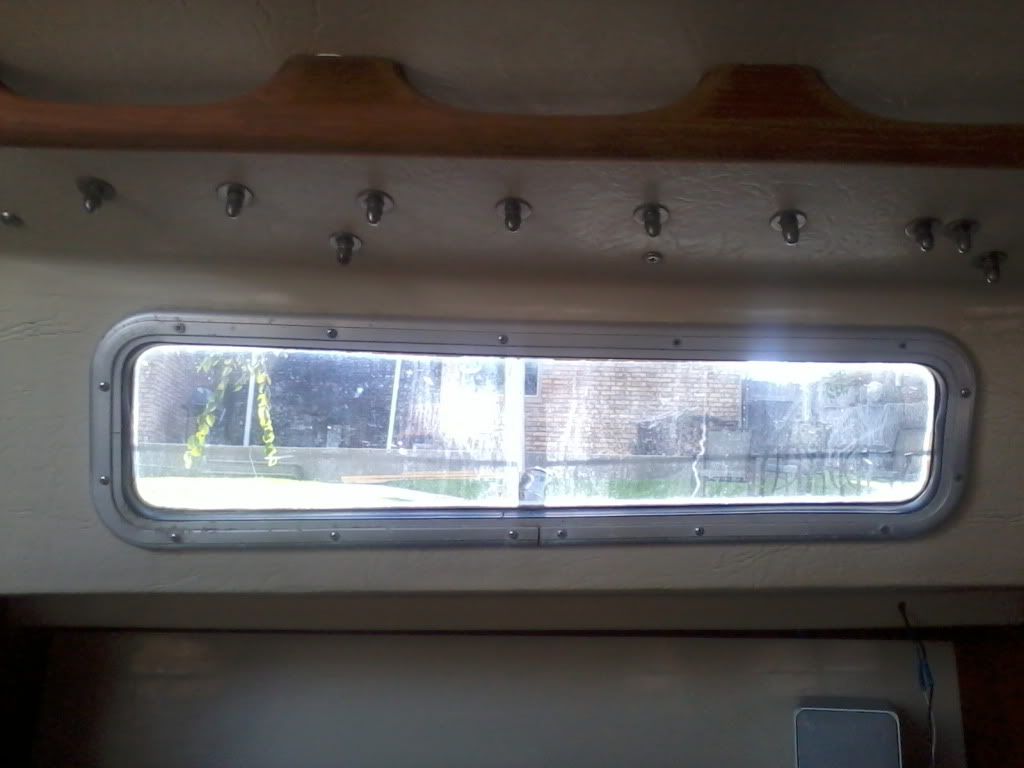
Of course, this project has drawn attention to our ugly and leaky hatches! We're not buying new hatches, but now we're working on restoring the ones we've got. (Notice the taped over hole where the hatch should be up front)? Update: Click here for post about restoring our old hatches.
Cruising Concepts offers a lot of great products for boats, and Mike provides great customer service. He's easily accessible and was happy to speak with me whenever we had a question. Check out his site!
Hasta luego ... until then. Mid-Life Cruising!


10 comments:
Nirvana is looking great! Thanks for the detailed instructions!
Nice job, guys! The boat is beginning to look brand new. Now all that's left is to take care of your rentals and get out cruising. Nirvana is looking beautiful.
Well done!
Wow what a great job and they look fabulous. You'll enjoy those new windows for sure. I'm sure they won't leak either. It's handy that your husband knows how to do so many things. Save lots of money.
Have a terrific day. :)
Wel you did your sponsor proud. So much it is now on my TDL and my windows don't even leak.
Really nice, I will be calling them in the spring to order.
wow! looks so much better..great job!
I know I'm a little late but I simply must add my "Wow!" to the bunch. It really looks great.
Question, "Is there anything Ken can't do?"
looks great and excatly as my C30 1980 TRBS did when i bought her in 2006! Nice website and format! I have done about 25 "TOP 5"
best upgrades to my boat and one of those is to ditch the curved traveler that i delyed for 5 years and did a bunmch of other stuff. WHY? did i wait so long? Stand alone a few hundred dollars from Garhauer and it is FANTASTIC, safer, and exponentially easier to operate. Cruising or racing I suggest few things will make sailing more enjoyable on a C30! I wish i did it 4 years earlier? http://www.l-y-n-c-h.com/Akula/content/20110921_9999_5_large.html I moved the new one forward a few inches to open up the view skyward and give more cabin top space for clutches and winches t.b.d. ~Thomas~
I am very curious to know now after a few years how these windows have held up...Thinking of doing the same to my 77 C30. Any leaking issues or popping off? And how have they weathered in the sun? Fade? or Cloudiness?
Bill, we are still very happy with our ports! They still look the same as they did when we installed them ... no yellowing, fading, cloudiness or leaks!
Post a Comment