
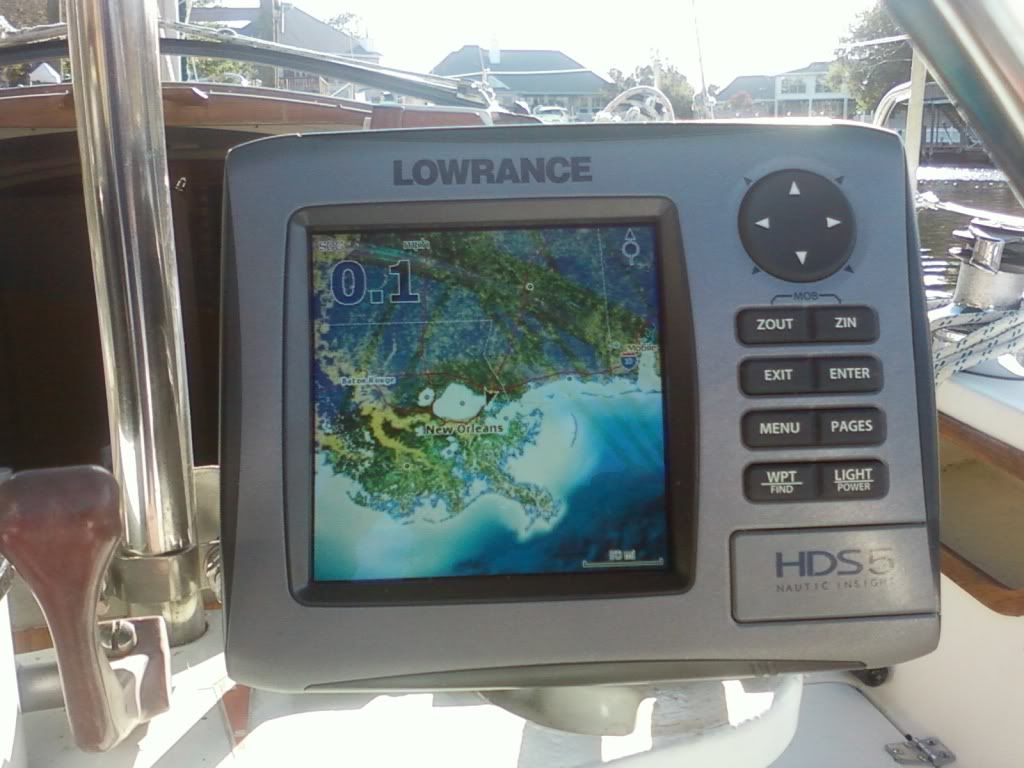
Do you see the black cursor right above New Orleans? That's our home!
A while back, we got a great deal on a Lowrance HDS-5 GPS/Chartplotter and also a while back we installed the depth transducer. While we need to tackle learning how to read the thing (so many symbols on that map), we first needed to tackle getting it installed! The Lowrance model that we purchased came with a depth finder, which meant that we (Ken) needed to install a depth transducer. For those that don't know what a transducer is ... it's a little device that reads the water's depth (as well as other things) then sends the information to our GPS screen.
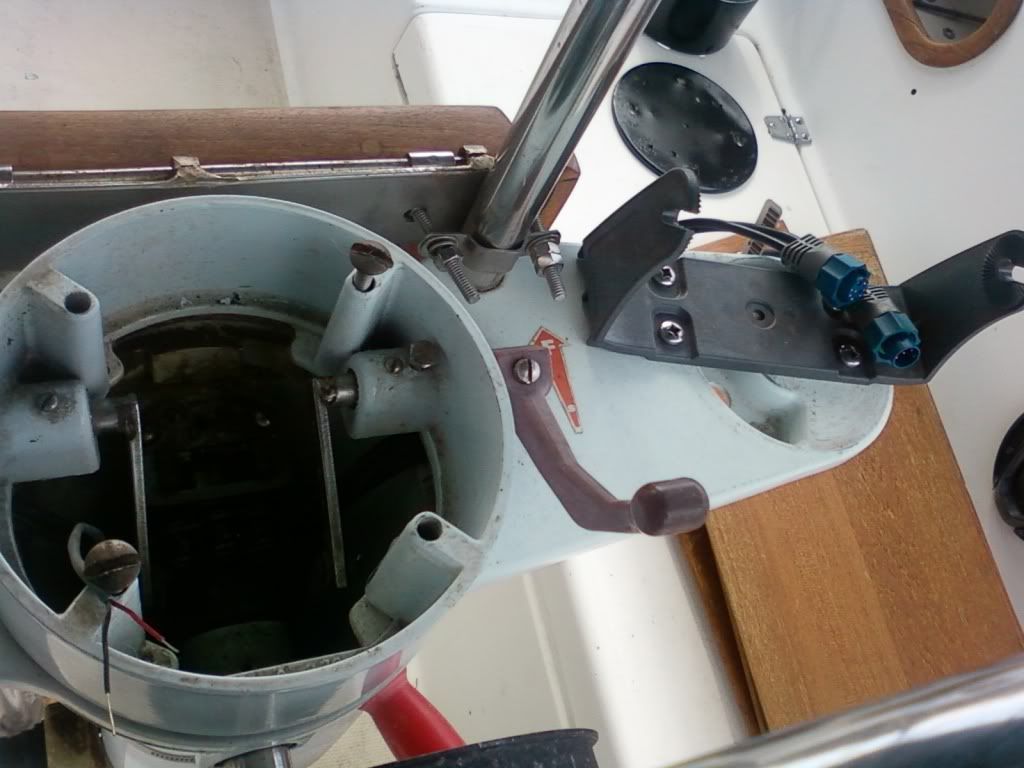
This really stressed Ken out, as he wanted to make sure he placed the transducer in the best place possible without catching interference from the strut, keel or anything else that may get in the way. When reading the info that Lowrance provided, it all pertained to motor boats. It discussed how to install the transducer on the transom ... no help! We needed to use the "through-the-hull" installation, meaning that the transducer would be on the inside of the boat and reading through the hull.
Nirvana already has a depth transducer near the bow, under the v-berth. We debated about whether to also install the new transducer near the bow and remove the older transducer. However, running the wires up to the front of the boat was not something Ken really wanted to tackle if not necessary. Plus, why not keep the older transducer installed as a back-up? When considering placing the transducer towards the rear center of the boat (back of galley), I worried that we would not have enough notice of shallow land and therefore run aground easier.
After way too much thought we agreed to place the transducer towards the back of the galley, underneath a cabinet. This location is pretty much at the back end of the center of the sailboat, right at the start of the cockpit. It seemed that there wouldn't be any interference, and Ken convinced me that with the slow pace of the sailboat a few feet wouldn't make a huge difference in measuring the depth. Plus, we'll still turn on the old depth finder which will give us a reading from the bow.
Ken removed the compass, an older transducer, and some instrument that never worked from the steering column then ran wires (with my help) down the column and into the existing terminal block in the aft cabin. From there, Ken connected the wires from the newly installed transducer. While Ken had the steering column torn apart, he was also able to fix the light on the compass which had never worked ... he's so smart! Also, he painted the bottom of the compass black to give it a newer and cleaner look.

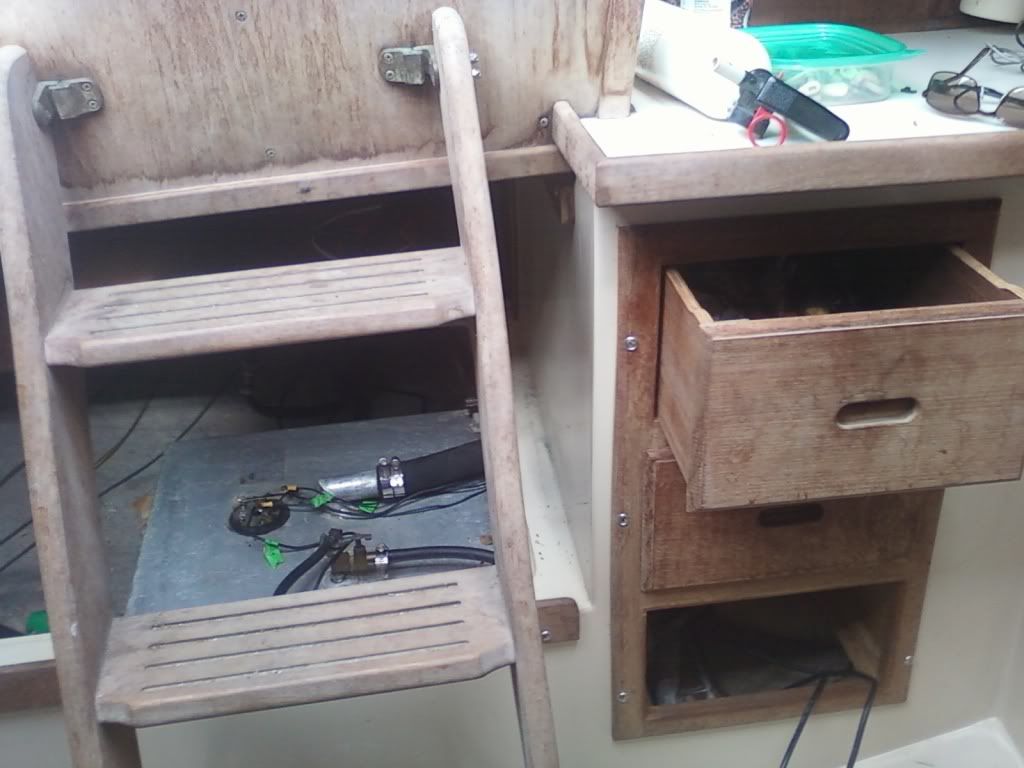
Aft cabin with cushions removed
View of steering column
After mixing up a batch of Marine Tex
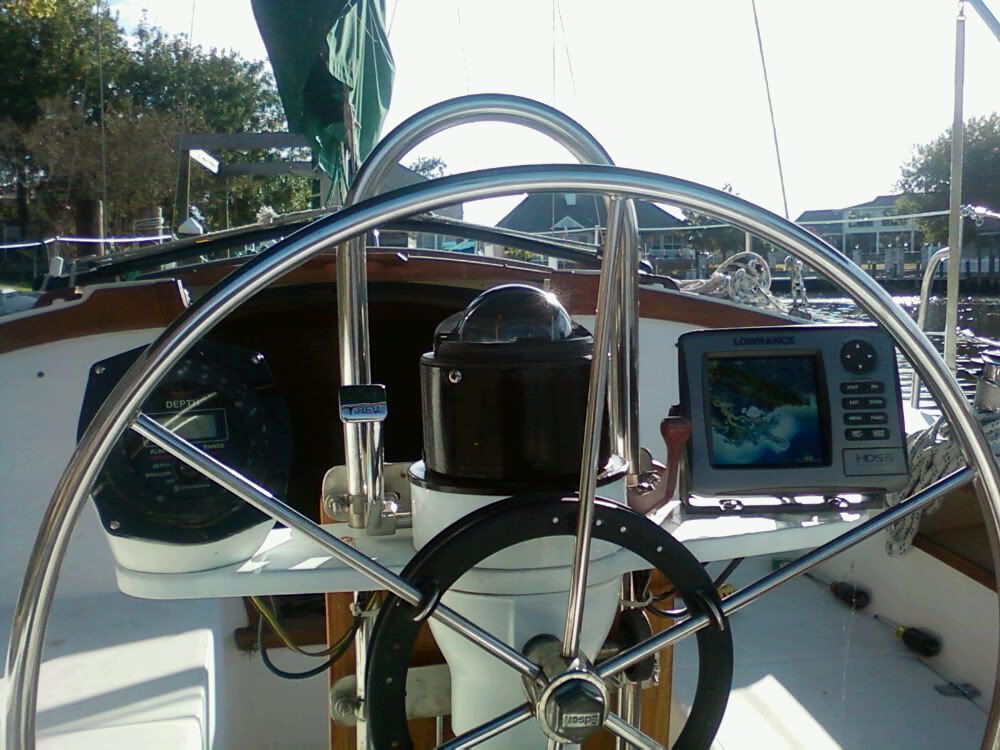
Steering column put back together with older depth finder, newly painted compass and new Lowrance!
Although we have no idea how to read a chart yet, it appears that we won't have to pry the transducer from its current location and start over. We did take a quick sail the following day, and it seemed that the depth was accurate (compared to original transducer) and for the first time we were able to see our speed ... 6 miles per hour! Ah, good things are to be enjoyed, not rushed. We need to play around with the Lowrance and see if we can change the speed to knots instead of miles ... I would hope so in today's modern age!
We're no fishermen, so we had no idea of the fish-finder was working properly. Although it's not a big concern for us, we'd like to learn how to use it as well. After returning from our sail, we learned from Lowrance's site that a good way to tell if the depth transducer is placed properly is to see if the fish symbols are in an "arch". If the arch is a little distorted one way or the other, that could indicate that the transducer is at a little too much of an angle. However, checking this while docked in the backyard will not be accurate and we must be out in the lake and moving. So, we'll find out later.
For those facing the same dilemma as us and trying to figure out where the heck to place their transducer on a 30 foot sailboat ... hope this helps. Every sailboat is different, but for us this seems to be a good choice. I hope I'm not eating my words later!
Now, how do we read a chart and how do we use this chartplotter?! We're aware that we will need to plot some courses, but I'm just wondering if some of the main routes are already in there .. you know, like the GPS in my car. Don't worry, we won't be running into you some dark night ... we are planning on taking a navigation course soon!
Gotta go ... I need to plot my course to the grocery store!
Hasta luego ... until then. Mid-Life Cruising!


2 comments:
You'll figure it out. Hubby is really good with his chart plotter and the radar too. You just have to know what you are doing and taking a course is the right thing to do.
Have a terrific day. :)
Awesome! I hope to get a chartplotter also, but It'll have to go inside the boat. I wonder if our inhull transducer will work with the plotters?
Post a Comment