

Since our sail to Mexico we've been busy working on boat projects to get Nirvana ready for cruising, including one project that we started last year. After giving our old alcohol stove an honest effort, we decided that we didn't like having to go into the cockpit & pump it every time we wanted to cook. So last summer we removed the alcohol stove/oven & purchased an RV drop-in cooktop from Camping World. No, it's not "marine" and it isn't gimbaled, but at only $108 we went for it!
For the last year, our new cooktop was covered with a cutting board and we'd been using an electric burner to cook. We knew we wanted a composite propane tank, but we weren't sure of how we wanted to attach the tank to Nirvana's stern. We also wanted to be sure that we ordered the correct parts for this project, which was a bit stressful. We don't wanna blow up!
With our flight to Mexico last summer followed by camping in Georgia to see the solar eclipse & then a 3-month road trip from Florida to California .. it was easy to put this project (and many others) off. However, the time had come to tackle this project if we want to start cruising the end of this hurricane season. We don't wanna spend another winter here in Louisiana .. it was freezing!
Adding propane to a boat sounds like a piece of cake, but like everything on our boat .. it's always much more difficult than it sounds! Ken did a lot of research .. high-pressure vs low-pressure regulator, choosing a solenoid, a control valve, providing chafe protection for the supply hose, attaching the stovetop to the hose, drilling holes in Nirvana's transom for the hose & the solenoid wire, making sure wires don't touch the supply hose, keeping water out of the holes in the transom .. all sorts of stuff to keep him awake at night!
After a lot of thought & measuring from cooktop to stern, Ken was finally ready to place an order. We ordered a 17 lb.Viking composite propane tank, the Breeze Make-A-Clamp to attach the tank to Nirvana's stern, and several items made by Trident Marine .. a solenoid & control panel kit, 15' of supply hose, a propane straight thru fitting (to run hose through transom), and a low pressure regulator.

Once our order arrived, Ken mounted the propane tank to Nirvana's stern with the clamps. This is a temporary solution, as a friend is going to weld a bracket for the tank to rest on. In the meantime, the clamps seem to hold well. We were worried about the 17 lb. tank being too big, but since it's the same diameter size as the 11 lb. and only a few inches taller we figured we'd go with the 17 lb. tank. We think we made the right choice! The only regret .. I didn't realize we could have ordered the tank in green or orange, which are Nirvana's colors. Oh well, not a big deal.


We chose a composite tank for several reasons .. the tank won't rust or corrode, won't explode in a fire, is lightweight, and is translucent which makes it possible to see how much propane remains in the tank. I've heard that some places won't fill these type of tanks, but we had no problem. I think that it used to be hard to find a location to fill these tanks, but not anymore. I know from a friend that we'll have no problems in the Bahamas!
It was time to start drilling holes .. ugh! We always hate the thought of putting any kinda hole in Nirvana, but it had to be done. Without going through every detail, I'll sum it up by saying that Ken pulled out the galley cabinets and was able to run the hose from the cooktop & under the galley bulkhead, through the port lazarette into rear lazarette, then through the transom. Holes had to be drilled in the galley bulkhead (for the control panel), the port lazarette & the transom.
First hole in lazarette next to galley bulkhead ... see that thin black hose? He also added that grey box, which holds the wires for the control panel that runs to the solenoid & to the batteries/nav station.

Hose and wire then ran over the port lazarette bulkead into the rear lazarette. I crawled into the port & rear lazarettes to tie-wrap the hose and wires to make sure the hose wasn't touching any wires. We don't want the hose to touch wires in case there's a short .. don't want to burn a hole in the hose! Ken leaned over the stern & was able to drill the holes in the transom.

We had ordered (above) a fitting for the hose to go through the transom, but we also needed something to prevent water coming into the other hole that the solenoid wire ran through. We ran to West Marine & luckily found a 2-hole wire cap. Ken installed the fitting/cap in the holes, then I again crawled in the rear lazarette and guided the hose and wire through the holes/fittings. Below is a photo of the hose & fitting going through the transom hole. We are going to add some material soon for chafe protection. In other areas, we wrapped some tape around the hose for chafe protection.

Once all the hose & wires were run, Ken connected them to the solenoid, which is connected to the regulator and tank.

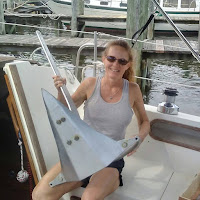
Here's a pic of the stovetop ...

and the control system mounted in our galley bulkhead.

After everything was hooked up, Ken sprayed all connections with soapy water to make sure there were no leaks. It all looked good,so then Ken ran a pressure test ... can't be too cautious. To run a pressure test, the tank was turned on, the solenoid control panel was turned on, then the propane burner turned on. We then turned the stove burner off, then the tank .. leaving the solenoid control panel on (solenoid open). We then looked at the pressure gauge & made sure there was no drop in pressure for at least 3 minutes. All was good .. whew!
We now have propane, and two burners too! It's been almost two weeks since this project, and we've cooked a few meals since then. It's been so much easier with two burners. I'm looking forward to trying out my Omnia oven soon! Ken plans on making it possible to connect our Magma grill to the propane tank too .. no more little green bottles!

As a safety measure, when we're done cooking we keep the stove burner on, then turn the solenoid control panel off until the flame goes out. We then turn off the propane tank and the burner. We don't have one of those expensive sniffers, but I'd like to get something to test areas of the boat every now & then. I'm thinking of something like this leak detector. Any thoughts or suggestions?

I'm not gonna lie .. propane on Nirvana makes us a bit nervous! But, we've taken precautions when installing the propane system and we plan on doing a pressure test on a regular basis. This will be easy to do after cooking a meal.
Here are photos of the before & after of our galley stove ...


With no oven, Ken added a shelf and we now have a lot more storage area. While at dock, we're using the area for a microwave, Foreman grill and Omnia oven. The Omnia oven will be great at anchor too!


Since this project, Ken has run 12v wire throughout Nirvana, added some 12v outlets, and some Caframo fans too! He's also replaced all of our interior lights with LED lights .. we're making progress! Look for posts about these projects (and many more) soon. Oh, and something we're really looking forward to ... we're waiting on some new batteries to arrive. They're not your ordinary batteries, so we're really excited that the company has agreed to give us a great deal on them & allow us to try them out. Stay tuned!
Hasta luego .. until then. Mid-Life Cruising!


3 comments:
Great job, Ken! Propane makes me nervous too, but we have it in our RV for when we are not hooked up to shore power, and as long as you take proper precautions and do your testing, you should be just fine. We enjoyed our propane cooktop on Logos (our C30) also.
Couple of problems here. The stove top is not gimbled. There are no clamps to hold a pot of boiling liquid in place. How hard/safe will it be to cook a meal after 4 or 5 days in a rolling anchorage? This set up seems OK for a weekender that can pick good weather but for living aboard on the move not so much. Not trying to criticize just giving a few things to think about. Ken should be able to fab up clamps to fit the pots. Use something like 3/8 inch stock and bend to shape. You can wear a thick water proof apron while cooking. We did find a long spring that fit our two pots to keep the lids in place. I put a hook on each end and threaded it through the lid handle. Hooks on the pot lip. A pain to use but the lids remained in place. Have you thought about a solar cooker? These kids liked theirs.
https://www.youtube.com/watch?v=Lx0O1Lvrrl8
You might want to mark your new propane tank. Something that you can ID easily. We went with two of the smaller tanks. They lasted a long time and they were easy to carry in. That way we used one tank while the other was being filled. You cannot always get the tank filled right away. Some places you have to leave it. The boat is looking great. Cannot wait for you to shove off. Ken
Emily, we're hoping we did everything correctly! RVs & boats have a lot of things in common, don't they?! =)
Anonymous .. thanks for the tips. We realize the stove isn't gimbaled, but as I mentioned in the post, we're okay with that. I plan on purchasing clips from Amazon that keep pots in place. As far as the pot lids .. we have a nesting set that has one lid with grooves on the bottom for fitting on all sizes of the pots .. LOVE it! No problems with the lid staying put! Thanks for following along .. we think Nirvana is looking pretty good too. We are excited about finally cruising after this hurricane season!
Post a Comment